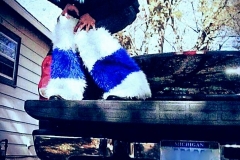
SCENE QUEENS® – Wolfie Whitefang
May 24, 2013 in May 2013 SQ Models, The SceneKing
HOW TO MAKE A WOLF TAIL 😉 *howls*
Supplies:
~ sissors
~ glue gun
~ glue sticks (for glue gun)
~ Needle
~ Thread
~ fake fur (any color you desire)
~ A hook clip (like the ones you use for keys) or wire
~ cotton
Step 1: Cut a strip of fake fur approximately 28 inches by 5 inches. Use thick fake fur as wolves have bushy tails.
Step 2: Lay the fabric on a flat surface, fur side down. Rip small pieces of cotton batting and line the tail from top to bottom with the pieces.
Step 3: Cut a piece of wire approximately 30 in. long. Create a loop on each end of the wire. Place the wire on top of the fabric and cotton batting. Don’t add in the wire if you’d rather use the hook clip. (i used the hook clip for my tail)
Step 4: Add an additional layer of cotton batting on top of the wires if you do use the wires.
Step 5: Place a line of fabric glue along the edge of one side of the material. Wrap the other side around, so the batting and wire are contained within, and press onto the fabric glue. This closes the length of the tail.
Step 6: Use the needle and thread to stitch both ends of the tail closed. Then use the wire to wrap one end around a belt, securing it into place.
step 7; If you decided to use the hook clip, you then glue one end of the clip (clip trigger facing opposite of fur) to the top end of the tail. After use the needle and thread to stitch and secure the glued hook clip part into place.
AND FINISHED!
ENJOY! 😀
-Wolfie <3


Recent Comments