You are browsing the archive for May 2013 Articles.

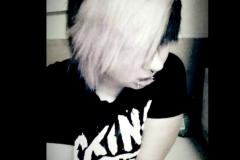
Aedon Ashes – Rainbow Hair

May 31, 2013 in May 2013 Articles

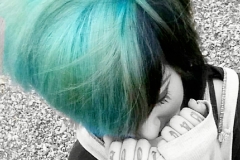
1 If necessary, bleach hair to a light/platinum blonde. Do not condition hair if you are coloring your hair right away.

2 Section hair using ponytail holders. You can do this any way you like.

3Using a highlighting wand or small hair color brush, thoroughly apply the color without letting it touch other sections. Wrap in plastic rap or tin foil if desired. Remember, the rainbow is red, orange, yellow, green, blue, indigo, violet.

4 Wait anywhere from 30 minutes to three hours. You can apply heat every once in a while to help the color set in.

5 Rinse out one section at a time to prevent bleeding, and put a conditioner on your hair.

6 Dry your hair and enjoy your rainbow!

619309961733368840_photo_on_rogersammie33_at_2.39_pm

SCENE QUEENS® – Yvette Antoinette

May 28, 2013 in May 2013 Articles

Easy Chalked Hair

What you’ll need:

1. Newspaper or a sink to lean over (chalking can get messy!)
2. A spray bottle of water
3. Plastic gloves
4. Chalk pastels
5. Flat iron
6. Hair dryer (optional)

Steps:

IMPORTANT:
– Have your hair straightened and/or styled before-hand.
– Wear a shirt you don’t care about getting dirty.
– Do NOT comb your hair after chalking – even if it’s dried. Combing
it will take out the color.

1. Lay out your newspapers or find a sink.

2. Put on your gloves so you don’t dirty your hands.

3. Taking your spray bottle, find a section of your hair and spray it
individually.

4. Then, pick out a color and turning it horizontally, run it down the
individual piece of wet hair until it is as vivid as you’d like. Avoid
running it up – this will only tangle your hair!

5. Repeat steps 3 and 4 on other strands of hair until you’re
satisfied. You’re done chalking!

6. Now at this point, you can choose to either blow-dry your hair with
a hair dryer, or wait until it dries on its own.

7. When your hair is dried – voila! You can now show it off
for…approximately one day. 🙂

image-1-edit

SCENE QUEENS® – Cheshire Hugz

May 27, 2013 in May 2013 Articles

-HOW TO CREATE ANIME/ DOLL EYES and face-
FIRST : get your make up materials of course<3 you will need black eye shadow, black eye liner, white eyeliner and or shadow, and you can use circle colored contacts if you want, but it is not required. Toner, bronzer, liquid and powdered foundation, blush, a toner lighter then your complexion and concealer. And if you feel as though you need fake lashes then fake lashes…
STEP ONE:
first apply the foundation of your skin tone
Step two:
Then take the Toner that is lighter then your skin and lightly brush the foundation that is lighter than your skin over your face.. to give you that doll-like skin.
STEP THREE:
Smile and lightly apply blush until you get the preferred pinkness.
STEP FOUR:
If you have contacts place them in now, if not just proceed to step 5
Step FIVE: ..
apply a thin line of white eyeliner/ eye shadow on your bottom eye lid so that your eyes look larger.
STEP SIX
do a large/ long cat eye on your upper eye lid
STEP SEVEN
trace the lining of your bottom lid right below the white line that you created earlier
STEP EIGHT
Use the black eye shadow to create a smokey eye just above your eyeliner 🙂
Afterwards, if you have fake eyelashes.. now would be a good time to place them on directly above your one lashes
STEP NINE
From the inner corner of your eyebrow use take a bit of bronzer (Or a foundation darker then your skin tone) and rub it on the sides of your nose
STEP 10
use the lighter foundation from the bridge down to the peak of your nose
STEP 11
Make sure you blend this all in well 🙂
STEP 12
Go over the steps to make sure you didn’t skip any steps ^_^ and if you didn’t then hopefully you have your desired doll-like complexion and face.

735098668519564283_sq